Hi, I’m Jakob Stewart, an AI researcher, digital artist, and writer.
Today, I’ll share a detailed tutorial on how to change your virtual influencer’s outfit using Stable Diffusion (Fooocus)
In this step-by-step guide, I will show you 2 effective methods to change the clothes of your AI Influencer.
Click on the links below to go directly to the topic:
- Accessing the Fooocus AI Tool
- Changing Outfits: Two Powerful Approaches
- Using FaceSwap Technique
Accessing Stable Diffusion (Fooocus) AI Tool Online
All you need to do is access this Google Colab link, which will take you to a simple and intuitive interface, and then click on the play icon.
It will give you this message:
Just ignore it and click the “Run anyway” button, the tool will quickly set up and provide you with a public URL to access the AI Tool.
When a link ending in “gradio.live” appears, click on it, and Fooocus will open.
Method 1 - Changing AI Influencer Outfit
You have 2 distinct methods for changing your virtual influencer’s outfit, each with its advantages. Let’s explore both approaches:
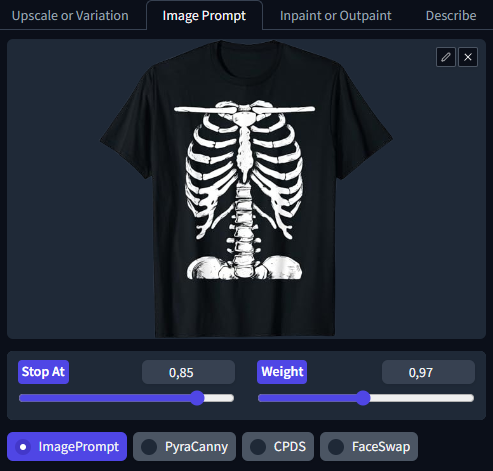
- First, check “Input Image” and go to the “Image Prompt” tab.
- You will see an option in the left corner labeled ‘Advanced’. Check that option.
- Add a photo of the clothing item without a background.
- Next, adjust the “Stop It” value to around 0.85 and the “Weight” value to around 0.96 or 0.97. (Play around with these values.)
- Now add the AI Influencer face and select the FaceSwap option.
- Then, provide a prompt.
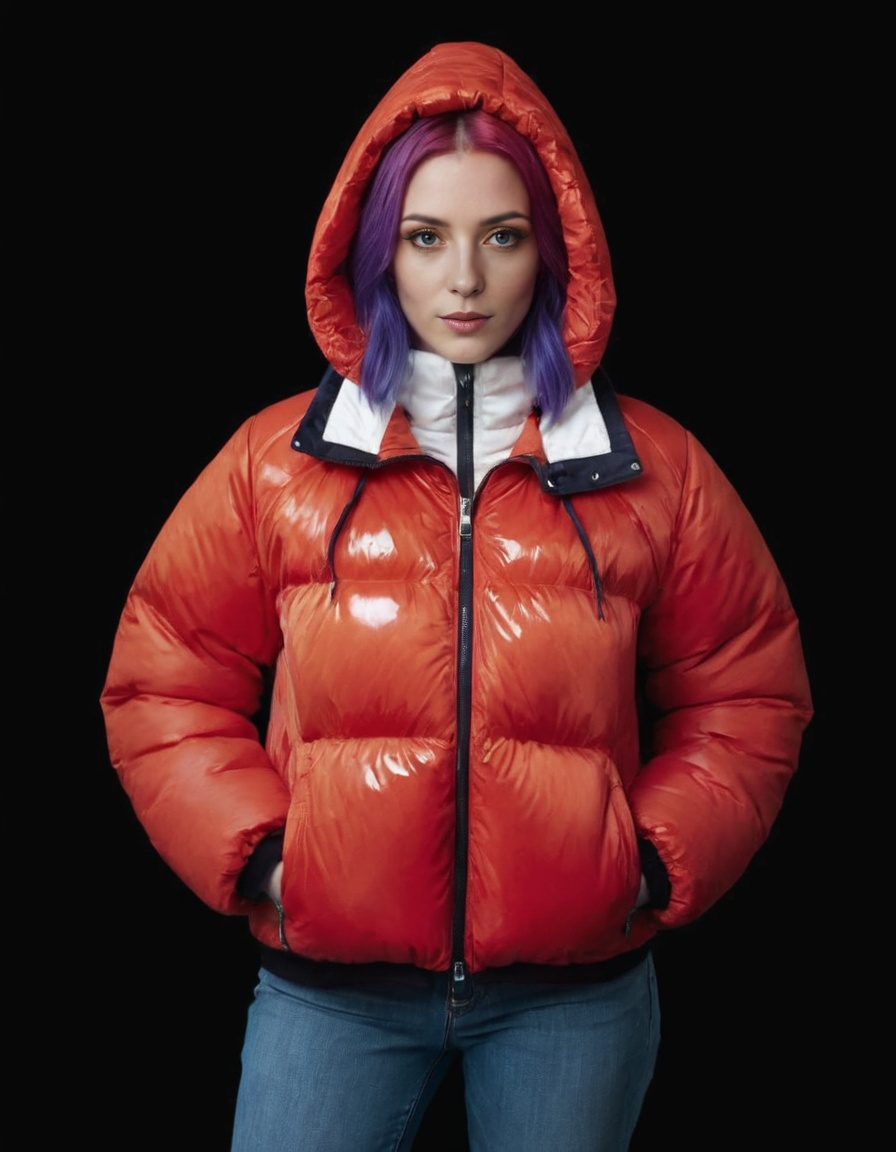
I wrote in the prompt:
"A woman with purple hair and blue eyes, wearing a red puffer jacket and blue jeans."After uploading the clothes without a background, the face of your AI influencer with the FaceSwap option enabled, and typing the prompt, just click “generate”.
This is the result I got:
Method 2 - Changing AI Influencer Outfit
The second approach allows you to change the outfit through inpainting, and editing existing images.
- Drop the image of your virtual influencer into the “Inpaint or Outpaint” section.
- Use the brush to mask the clothing item that will be changed, see the example:
Now in the “Image Prompt” tab, add the clothing item. In my case, it’s a black T-shirt with a bone print.
The prompt will look like this:
Now go back to the “Inpaint or Outpaint” tab and click “Generate”.
You should get a result like this:
You can do the same with various types of different clothing items. Remember, the clothing item should have no background.
Faceswap Technique Using Roop Unleashed
Now you can take these images and use the FaceSwap technique that I have already taught in various posts on the blog.
If you don’t know what it’s about, click here.
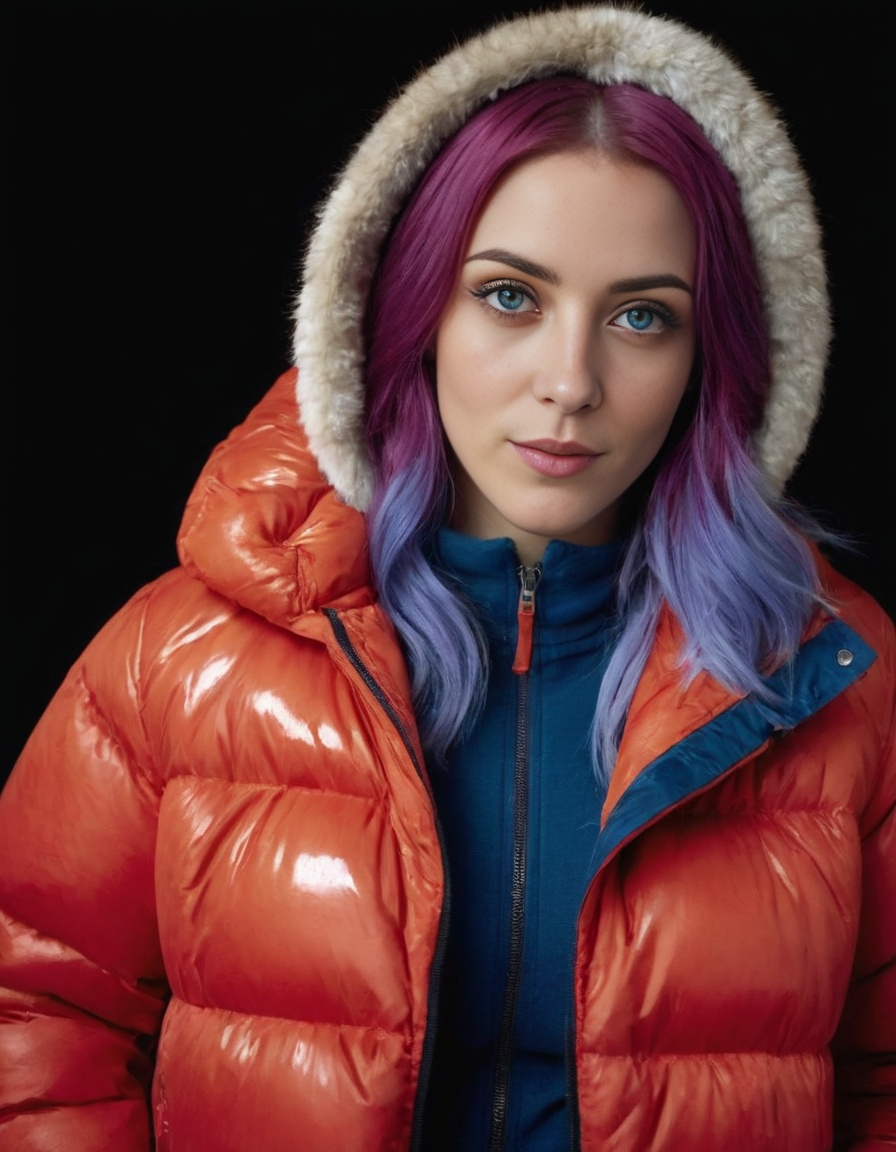
After the FaceSwap, you will get results like these:
🧨 More Tutorials:
- How to Install Stable Diffusion in 3 Steps (2024): Easy Tutorial (Fooocus)
- Run Stable Diffusion Online in 2024: No-Download Tutorial (Easy Colab Virtual Machine)
- My review on NectarAI (NSFW AI Girlfriend and Image Generator)
- 7 Best Upscalers on Stable Diffusion + Supir (AI Upscaler Tool)
- How to Set Up and Use Roop-Unleashed NSFW FaceSwap
- Create an AI Influencer in 3 steps (2024) - Easy tutorial
- Where to Sell NSFW AI: Top Platforms and Tips (2024)
For updates on AI tools, you can subscribe for free here.
Reference images